Neither a feather or a claw
There aren't any FAQs or Q&As yet, sorry :/ This page will be updated as soon as there are any!
How to become a bird photographer (according to yours truly)
Wanna become a bird photographer? I'm glad to hear it!!! Below are my thoughts and guidance on becoming one, along with some general tips and tricks :P
What you'll need
Gear
The gear you'll need to take on the feathery wildlife
A Camera body: Doesn't matter too much
The camera body is, surprisingly, not the most important part. The only thing that I'd look for is a camera that can function at higher ISOs with less noise.
Tripod: Fine-tuning is key
Find a tripod/stabilizer/etc. that you can fine tune easily. The harder it is to fine tune, the harder it will be to film and photograph with a bigger lens.
Laptop: On-the-go necessity
While not necessary for shorter trips (such as looking around your backyard), if you're planning on traveling far and wide for photos having a laptop with your photography software and to store your photos on is recommended. That way you can edit and upload photos from your hotel room or even straight from the field if you have a way to power it and connect to the internet. If you're just shooting photos locally (like me), your desktop computer or home laptop will work just fine.
Lens: At least 300mm
The lens is the most important part. It will define how close you have to get to the birds and how little you'll have to crop. Your lens should include a focal length of at least 300mm, but the more you can get without breaking your bank, the better. I'd recommend a 70-300mm lens for hobbyists and, if you wanna do it as your job, upgrade to a bigger one once you've got enough money.
Backpack: The less lugging, the better
A photographer's backpack to carry your stuff is necessary, especially with a bigger lens. Carrying around a camera bag and a tripod on your shoulder is gonna make it hard to photograph things. If you get a laptop, you could store it in here too!
General hiking gear: Be prepared
You know your needs best, so be prepared for whatever you might need. If you're photographing locally, a pair of boots, some long pants (to ward off ticks), and a walking stick will probably be enough (though a water bottle won't hurt). If you're hiking in winter, warm clothes, and if you're planning to go on long hikes and stay out in the wilderness all day, trail food and a water bottle is a good idea. Binoculars can help, but your lens should already cover that. :P
Protective measures
Did I mention the ticks yet? (I'm deathly afraid of ticks XD) Seriously though, you're gonna be running out in the wild so you're eventually gonna get bit by SOMETHING. So, to protect against that, long sleeved pants and even shirts/sweaters in some situations, bug spray, and perhaps a flamethrower in case one tries to burst out of your chest. (Did I mention I hate ticks yet?)
DO YOUR RESEARCH PEOPLE
Make sure you know what you're getting into before you burn a couple hundred+ bucks on a fancy piece of glass and metal machinery that you may end up never using. Make sure bird photography is for you and that you can do it in an affordable manner before throwing all your money at it.
Settings
What should your settings be out in the field? (Please note: I use a Nikon d3400 and will talk about what the settings are on my camera. Your camera may be different than mine and use different terminology.)
Aperture: Not quite as large as you can make it
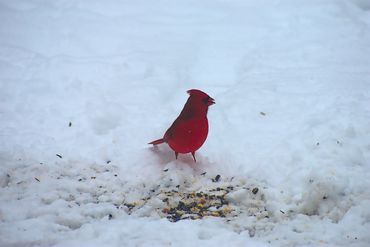
Make your aperture a little smaller than your max size so that you can capture the whole bird. Ideally, you want at least the bird's eye in focus if nothing else. However, sometimes it's hard to keep it in focus when it's moving around and your focal plane is a little unclear. So, to compensate, make your aperture around 8-10 so that you're more likely to get the bird in focus. However, if photographing a bird in flight, the smaller you can get your aperture, the better.
Shutter speed: Gotta go fast
For most photography, you keep your shutter speed around 1/80-1/120ish, maybe higher for things like sports photography. For birds, however, you want to keep your shutter speed at a minimum of 1/400, preferably higher (especially of there's a lot of motion). This is to make sure camera shake and the bird moving doesn't cause too much blur. If photographing a bird in flight, however, you need a minimum of 1/1000, preferably higher (around 1/1600+).
ISO: As low as you can get it given the lighting
The higher your ISO, the more grain and messiness it introduces into the picture. You CAN fix this in post, but that can make the picture look blurry in the worst of cases. To compensate, try to keep your ISO as low as you can get. One thing you can do to compensate is try to *slightly* overexpose your pictures whenever possible, then lower the exposure in post.
Focus mode: Depends
I've heard varying consensuses on what your focus mode should be. One friend told me to only use manual focus, and a video I refer to often recommends using continuous focus. So, what to use? I say it depends on the subject. If a bird is standing still, use auto-focus. If there's a lot of twigs and/or your camera keeps focusing on the wrong thing, use manual. If the bird is moving fast (such as if it's in flight), use continuous focus. I generally use auto-focus and manually focus when needed.
Area mode: Small yet specific
If your camera is anything like my camera, it should have little points or dots in the viewfinder that are highlighted when you auto focus. These tell you what your camera is focusing on. By default, your camera should use Auto-area-AF. This means that it will try to focus on any and all of those points. This is not good for bird photography, as with this the camera will have trouble figuring out what to focus on. Instead, use Single-point AF, where the camera will only use one of those points.
Picture mode: Continuous
Keep your camera set to continuous or "burst" mode to increase your chances of getting a good shot. How this works is that as long as you're holding down the shutter button, the camera will take photos until it can take photos no more (such as if the memory card needs time to process/runs out of room). This increases your chance of getting a great shot.
A final note
If you know anything about how cameras work, you'll notice that these settings tend to darken your photos. This is to be expected. So, to compensate, play around with your settings and try to do the best given your lighting. More on that next section. If you want more info on settings and how to get good bird photos in general, you can check out this video by Will Goodlet. A lot of what I've mentioned here I got from him.
Out in the field
What can you do to increase your chances at getting a good shot out in the field and just be a good birder in general
Check your lighting
As mentioned above, recommended settings for bird photography tend to make your photos darker. So, to compensate, try to make the best of your lighting. While you can photography in overcast days, I prefer to photograph on bright, sunny days when there's more sunlight shining directly onto everything. However sometimes you don't have that level of control and need to make the best with what you have.
Time of day: Whatever the light touches
Dawn is by far the best time of day for bird photography, but any time of day works well. For nocturnal species in particular, dusk is a good time to spot them. However, dusk also reduces the amount of sunlight you'll get, so dawn is preferable. They're just going to bed as other birds are just getting active. At dawn, the light also increases with time!
Avoid calls and manipulating the birds in excess
Using calls and trying to manipulate the birds is generally not the best idea. Calls can disrupt birds and distract them from what they're supposed to be doing (like feeding and protecting their nests) and steal potential mates from them. It is also illegal to call certain birds (particularly endangered ones) and in wildlife parks.
Get closer to the birds
Having a fancy telephoto lens helps, but really the best way to get sharp, in focus photos is to get closer to the birds, regardless of your lens size. This is tricky, but it can be done. Avoid looking and staring at the bird, move carefully and quietly, perhaps learn how to climb trees...? (Half joking on that last one 😉) You can also try "pishing"; making a "pish" sound to call certain birds to you, but the rules of calling still apply to that. Here is a good video on the subject.
Become familiar with the birds in your area
Becoming familiar with local birds can help a lot. Learn the habitats they tend to frequent, try and find birding hotspots near you, and keep and ear and an eye out for birds and their calls. Using an app like audubon to identify birds and their calls can help a lot.
Use birding apps and sites
As mentioned above, the audubon app can help a lot in identifying and locating birds. Searching for hotspots in your area via ebird or other sites can help a lot, especially for specific species.
When photos fail, use video
I've found that whenever a good photo is impossible, breaking out my tripod and taking a video often works better (granted the bird and my tripod can keep still enough). If a picture is worth a thousand words, a video is worth a thousand pictures. It'll compensate for the quality issues at least to a degree. However, a video is only really feasibly with a stationary bird or a nest and if you have a tripod.
In post
Finally, what should you do for editing?
Programs
What program you use is entirely up to you. Generally I use the program Darktable, it's free and fits my needs. Lightroom is good too and quite user friendly, but whether you want to pay annually for it is up to you.
Exposure
Playing with the exposure can help improve a photo. If you've employed the overexposure method, lowering the exposure can reduce a photo's noise.
Watermark
I don't really bother with it. You can if you want, but I don't find it necessary. I'd state more, but I'd just be rehashing this article so go read that for more details.
General fixing
I generally sharpen and denoise my photos a little to increase quality. I also employ the haze removal tool to help bring out color and, well, reduce haze. Not much else to say there except, again, don't overdo it.
Croping
Try to crop your images where the catchlight (the reflection of the sun/light source in the bird's eye within (or just the center of the pupil of there is no catchlight) of the bird's eye lines up with the rule of thirds or the golden ratio. However, try to minimize the need for cropping wherever possible as it just magnifies issues such as noise and reduces the quality of your pictures.
Saturation
This isn't for everybody, but I like to up the saturation on my photos to bring out the color of the birds and the surroundings. Don't overdo it though. Sometimes a little goes a long way.
Brightness and Contrast
I usually play around with the contrast and brightness a bit to bring out the features and color of a bird.
And, finally...
Don't rely too much on editing. Make sure your photos are good when you take them. Editing is like makeup, they can improve and underline your beauty, but it can't fix the cancer growing on your lungs. If your photos aren't good when you take them, editing won't fix it.
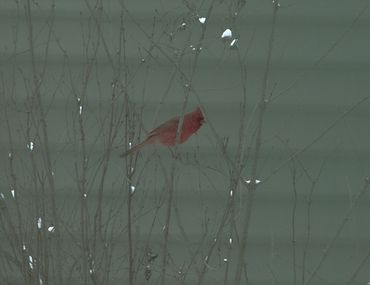
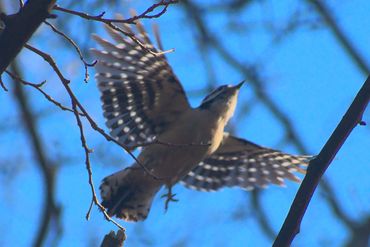
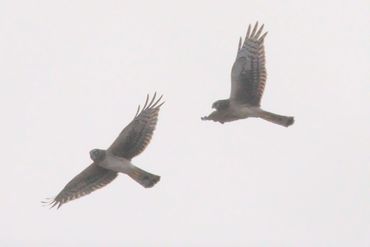
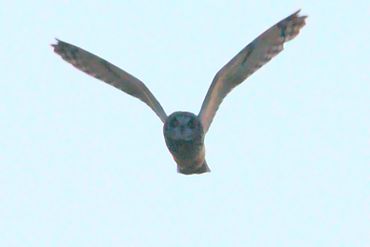
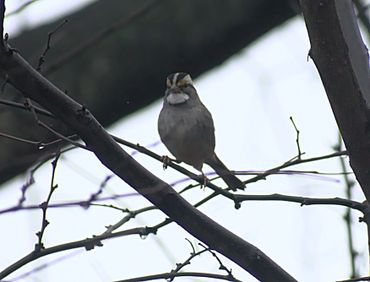
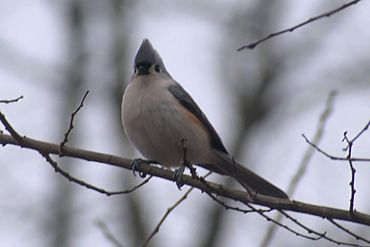
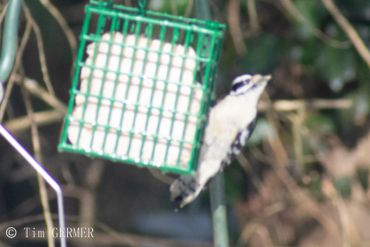
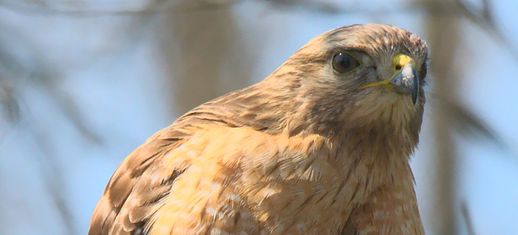
Photos that Editing couldn't save
Many of these would have been some of my crowning joys had the lighting been better or the focus been more on point. This is why you don't rely on editing to fix your photos and try to make sure your photos are good as they are when you take them.
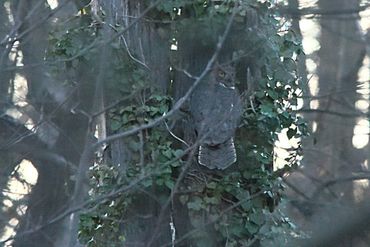
A video I took when photos failed
I got this video while photographing an owl nest when I realized that the lighting was just too poor to get a good photo. This video has not been cropped or edited in any way, apart from some cuts and transitions.

A final note
Bird photography takes a little bit of patience and exploration and will take time to master. You just have to be vigilant and patient and you'll get better at it. Many of the pros still take bad photos daily, hourly, or even per shoot/subject, so it doesn't make you a bad photographer. Just be patient and persevere :D
Videos I referenced
- Taking Sharp Bird Photos | In depth (by Will Godlet)
- 5 Tips For Taking Razor Sharp Images - Bird Photography Secrets Revealed - Jan Wegener Vlog (By Jan Wegener)
- Filming Wildlife | 6 Tips to Instantly Improve! (By Stefano Ianiro Wildlife)
- How to Photograph Small Birds: Camera Settings & Techniques (Advanced) Paul Miguel Photography (By
- Paul Miguel Photography)
- How to Approach and Get Close to Birds (Bird Photography) (By Tim Boyer Photography)
No answers here? No worries! Here's my contact page :P
Copyright © 2021 Timtography - All Rights Reserved.
Powered by GoDaddy
Notice
I am building this site for when I start to sell my photos, however, I have not started selling them yet. Feel free to root around my site though!!! In the meantime, here's my portfolio :P
All rights reserved.